Every week, somebody texts me a blurry close-up of a leaf with three words: “What is this?” After 25 years of house calls across Austin and the Hill Country, I can usually name the bug before I’ve finished reading the message — because it’s almost always one of the same five or six culprits.
Here’s what most people don’t realize: the pests you fight in an Austin home aren’t random. They’re driven by the exact conditions we live in. Our AC runs eight months out of the year, which means the air inside your house is bone dry — and dry air is a spider mite’s idea of paradise. Then people overwater trying to keep up with that dryness, and now you’ve got fungus gnats. The bugs follow the conditions.
So let me walk you through the ones I actually see in Austin homes — what they look like, where they hide, and exactly how I get rid of them. For almost all of them, my answer is the same two things, and I’ll get to that.
Pest #1: Spider Mites — The Austin Special
If I had to bet on one pest sight-unseen, it’d be spider mites, every time. They thrive in hot, dry, still air, and that describes the inside of nearly every air-conditioned Austin house from April through November. When our indoor humidity drops into the 20s and 30s during a long AC stretch, mites explode.
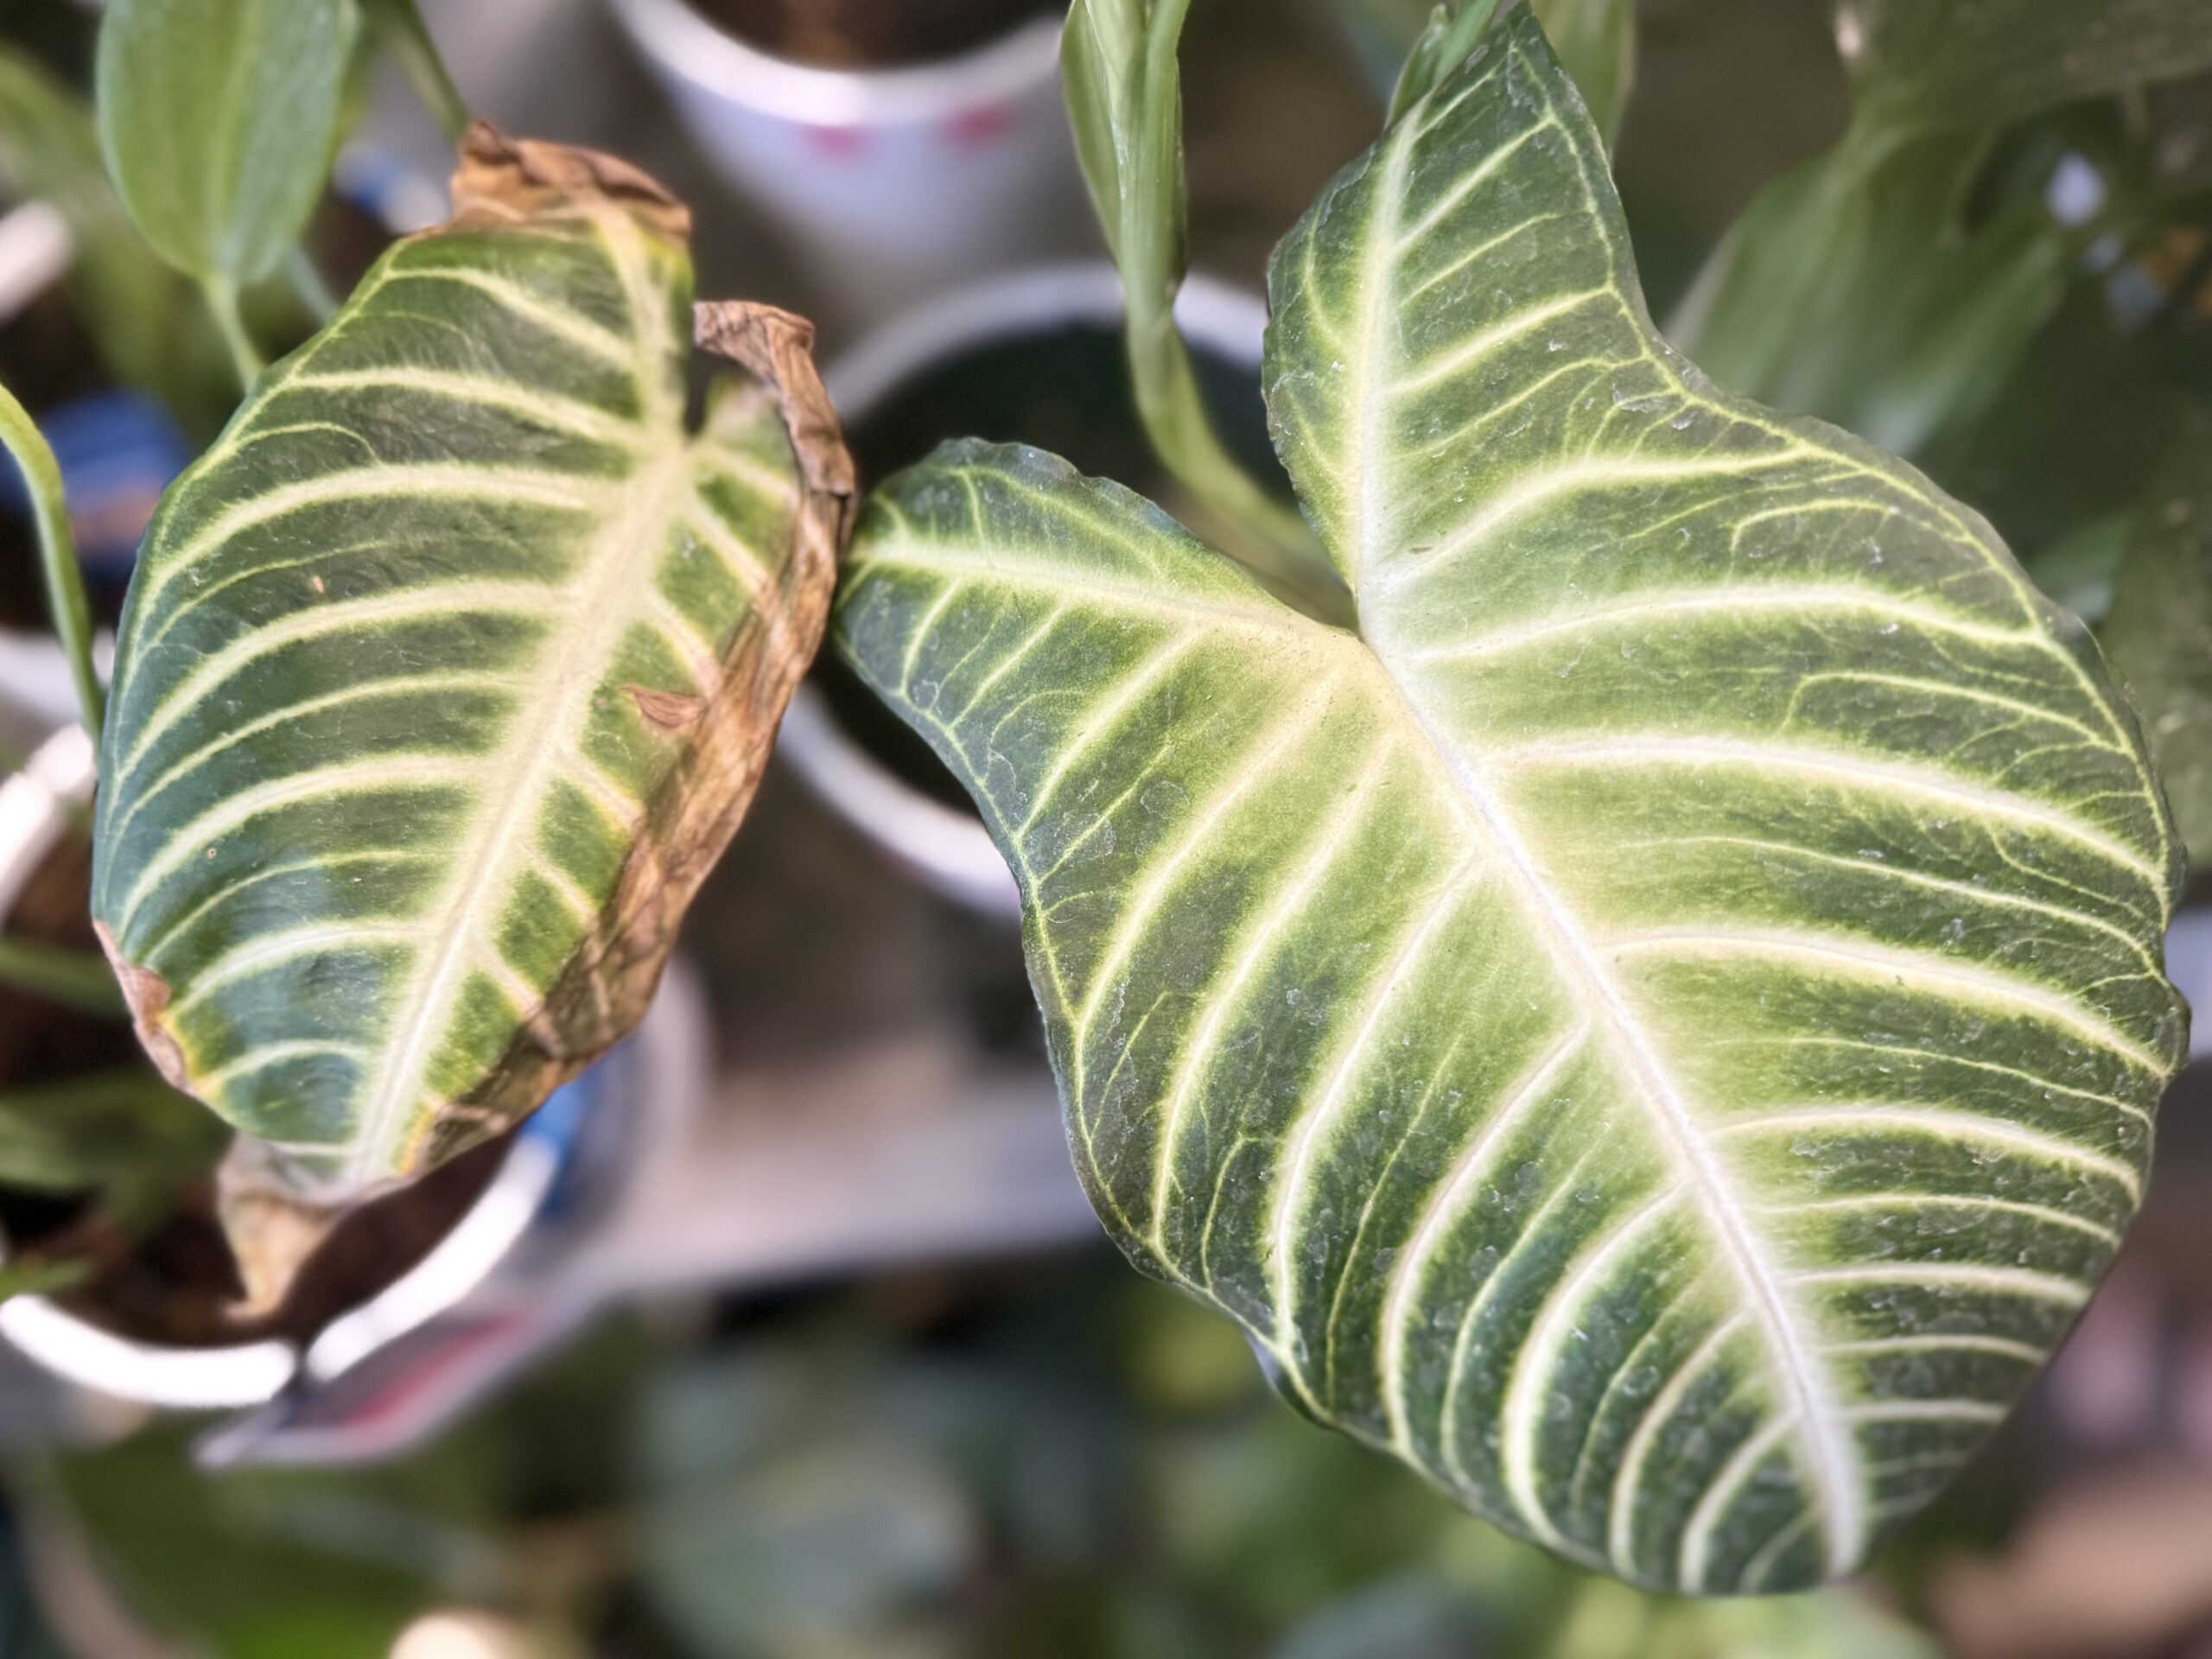
The tricky part is you usually can’t see the bug itself — they’re smaller than a grain of salt. What you see is the damage: a fine stippling or “dusty” speckled look across the leaf, like someone went at it with a faded pin. As it gets worse, you’ll find fine webbing tucked into the leaf joints and along the undersides. Flip the leaves over and hit them with your phone flashlight — if you see tiny moving specks, that’s them.
They go after calatheas, ivy, palms, scheffleras, and anything already stressed. In Austin, that “already stressed” part matters, because a plant fighting our hard tap water is a plant with its guard down.
One thing to flag up front, because it trips people up constantly: spider mites are the exception to my usual treatment. The systemic granules I lean on for everything else won’t touch them. Mites are a neem-oil job — and I’ll explain exactly why below.
Pest #2: Mealybugs — The Cotton Fuzz
These are easy to ID once you know them. Mealybugs look like tiny tufts of white cotton or lint wedged into the crevices where a leaf meets the stem, or buried down in fresh new growth. They move, but slowly, so people often mistake them for fuzz or mold at first.
The giveaway beyond the cotton look is stickiness — mealybugs excrete honeydew, so if the leaves below them feel tacky, you’ve found your problem. They love succulents, hoyas, orchids, and pothos, and they’re patient: they’ll hide deep in the growth point and reappear weeks after you think you’ve won.
Pest #3: Scale — The One That Hides in Plain Sight
Scale is the pest people walk past for months. It shows up as small brown or tan bumps along the stems and the undersides of leaves, and because they don’t move and look almost woody, most folks assume they’re just part of the plant.
Run a fingernail along a stem — if a “bump” scrapes off with a little wax behind it, that’s scale. Same honeydew tell as mealybugs: sticky leaves, and sometimes a black sooty mold growing on top of that stickiness. Scale loves ficus, citrus, ivy, and ferns, and it’s one of the more stubborn ones because that waxy shell shrugs off a lot of sprays.
Pest #4: Aphids — Usually a Summer-Outside Souvenir
Aphids are the soft little pear-shaped bugs that cluster on tender new growth and flower buds. Most are green, but I see black, white, and even pink ones. They reproduce fast and leave the same sticky honeydew calling card as the others.
In Austin, aphids most often show up on plants that summered outside on a porch and got carried back in for winter. If you move plants out for the warm months — and a lot of my clients do — give them a hard inspection before they come back inside, because that’s the trip where the hitchhikers get on board.
Pest #5: Thrips — The One Getting Worse
Thrips have gotten noticeably more common in the last few years, and they’re the ones that make me sigh, because they’re the hardest of this group to fully clear. They’re tiny tan or black slivers — picture an animated grain of rice, or a little comma that moves when you disturb the leaf.
You’ll often spot the damage before the bug: silvery, scratched-looking patches on the leaves and tiny black dots of frass (that’s their droppings). New leaves come in distorted, scarred, or stuck together. They fly, so they jump from plant to plant fast — which is why thrips on one plant means inspecting everything nearby. Monsteras, philodendrons, and alocasias get hit the hardest.
How I Treat Almost All of These: Neem Oil + Systemic Granules
Here’s the part I promised. For mealybugs, scale, aphids, and thrips, my treatment is the same one-two punch, and it’s worked for me for decades. Spider mites are the one exception in this group, and I’ll get to them right after.
Neem oil handles what you can see. I mix it up and spray the whole plant down — tops, undersides, leaf joints, stems, everywhere they hide — and I repeat it weekly. Neem works on contact and disrupts the bugs’ ability to feed and reproduce, so consistency is everything. A couple of Austin-specific notes I’ll save you from learning the hard way: never spray neem on a plant sitting in a hot, sunny window, and don’t do it in direct sun. The oil plus our intense light will scorch the leaves. I spray in the evening, or I move the plant out of the light first.
Systemic granules handle what you can’t. You work the granules into the top of the soil, water them in, and the plant draws the insecticide up into its own tissue. From then on, anything that bites the plant — including the eggs you missed and the bugs buried deep in new growth — gets dosed from the inside out. The houseplant systemic granules (the active ingredient is usually imidacloprid; just make sure you grab the one labeled for houseplants, not the lawn-and-garden version) are what turn this from a month-long slog into an actual fix.
Together, the neem knocks down the live population on the surface while the systemic poisons the plant from within so the next generation never gets established. That combination is how I clear infestations people have been fighting for months with spray alone.
Now, spider mites — the exception I flagged. Systemic granules will not work on them, and this is the mistake I correct most often: people dose the soil, wait a few weeks, and can’t understand why the webbing keeps spreading. The reason is that mites aren’t insects at all. They’re arachnids — closer kin to spiders than to the bugs the systemic is built to kill — so the plant can take up all the insecticide it wants and the mites won’t so much as flinch. For spider mites, neem oil is the entire program. And because they breed so fast in our dry Austin air, you have to stay on it hard: a thorough weekly spray, every surface, tops and undersides, until you’ve gone two or three weeks straight with no fresh stippling.
For the rest of the group, if you want to keep it all-natural, you can skip the systemic and run neem oil exclusively — the same way spider mites force you to anyway. But know what you’re signing up for. Neem only kills what you directly coat, so you have to be religious about it: every leaf, both sides, every week, for several weeks straight, to outlast the eggs as they hatch. It absolutely works. It just asks a lot more of you than the two-product approach does.
A few rules I follow no matter which route you take. Isolate the affected plant away from the rest of your collection the day you spot the problem. Wipe or rinse off as many bugs as you can before you treat. And be patient — pests come in waves as eggs hatch, so “looks better” on day three is not the same as “gone.” I budget three to four weeks before I’ll call something clear.
The Exception: Fungus Gnats
Now for the one pest where everything above is the wrong answer. If you’ve got little black flies bobbing around the soil and drifting up into your face, those are fungus gnats — and reaching for neem and systemics is treating the symptom instead of the cause.
In Austin, fungus gnats are almost always a watering problem in disguise. Here’s how it happens: the AC dries out the top of the pot, you see dry soil, you assume the plant is thirsty, and you water again — but down below, the soil is staying wet. That constant moisture is exactly what gnat larvae need to live and breed. Fix the moisture and you’ve fixed the gnats.
So the move is to let the soil actually dry out between waterings — the top inch or two should go bone dry before you water again. Yellow sticky traps will knock down the flying adults you already have. And if there’s an established population, a Bti product (mosquito bits or Gnatrol, watered into the soil) kills the larvae without any harsh chemicals. Bottom-watering helps too, since it keeps that top layer drier. The adults are mostly harmless to a healthy plant — but they’re a sign your watering is off, which is worth fixing for the plant’s sake anyway.
When You Can’t Tell — Or Just Don’t Want to Gamble
I’ll be honest: bug ID from a phone photo is genuinely hard, and several of these look alike until you’ve seen a few thousand of them. If you’ve flipped the leaves, hit them with the flashlight, and you still can’t tell what you’re dealing with — or it’s a plant you love and you don’t want to run experiments on it — that’s exactly what I do.
With a Keep Austin Watered Plant Rescue House Call, I come out, identify what’s actually going on, treat it on the spot, and tell you whether the rest of your collection is at risk. No contracts, no corporate runaround — just me, the same person every visit, with 25 years of knowing which Austin bug is which. Text me a photo to start and we’ll figure out whether it’s a quick fix or a house call.
Further reading